On-Brand Product Photos for New SKUs: Build a Reusable Brand Template
Create on-brand product photos for every new SKU: turn your brand style into a reusable shot list, then re-run it on each new product with the same settings.
On this page
- What makes a product photo "on-brand"
- Step 1: Turn the table into a style block
- Step 2: Write the shot list once
- Step 3: Fix the settings and write them down
- Step 4: Run the first SKU and approve the look
- Step 5: Every new SKU is a Remix
- Step 6: Use an approved image as a style reference
- Step 7: Review against the brand, not just the product
- Automating the template
- A template checklist
Launching one product is a photo shoot. Launching a new SKU every week is a production line, and that is where brands lose their look: the first collection was shot with care, the fifth was shot on a phone, and the tenth borrowed the supplier's photos. Nothing is wrong with any single image; the shop just stops looking like one brand.
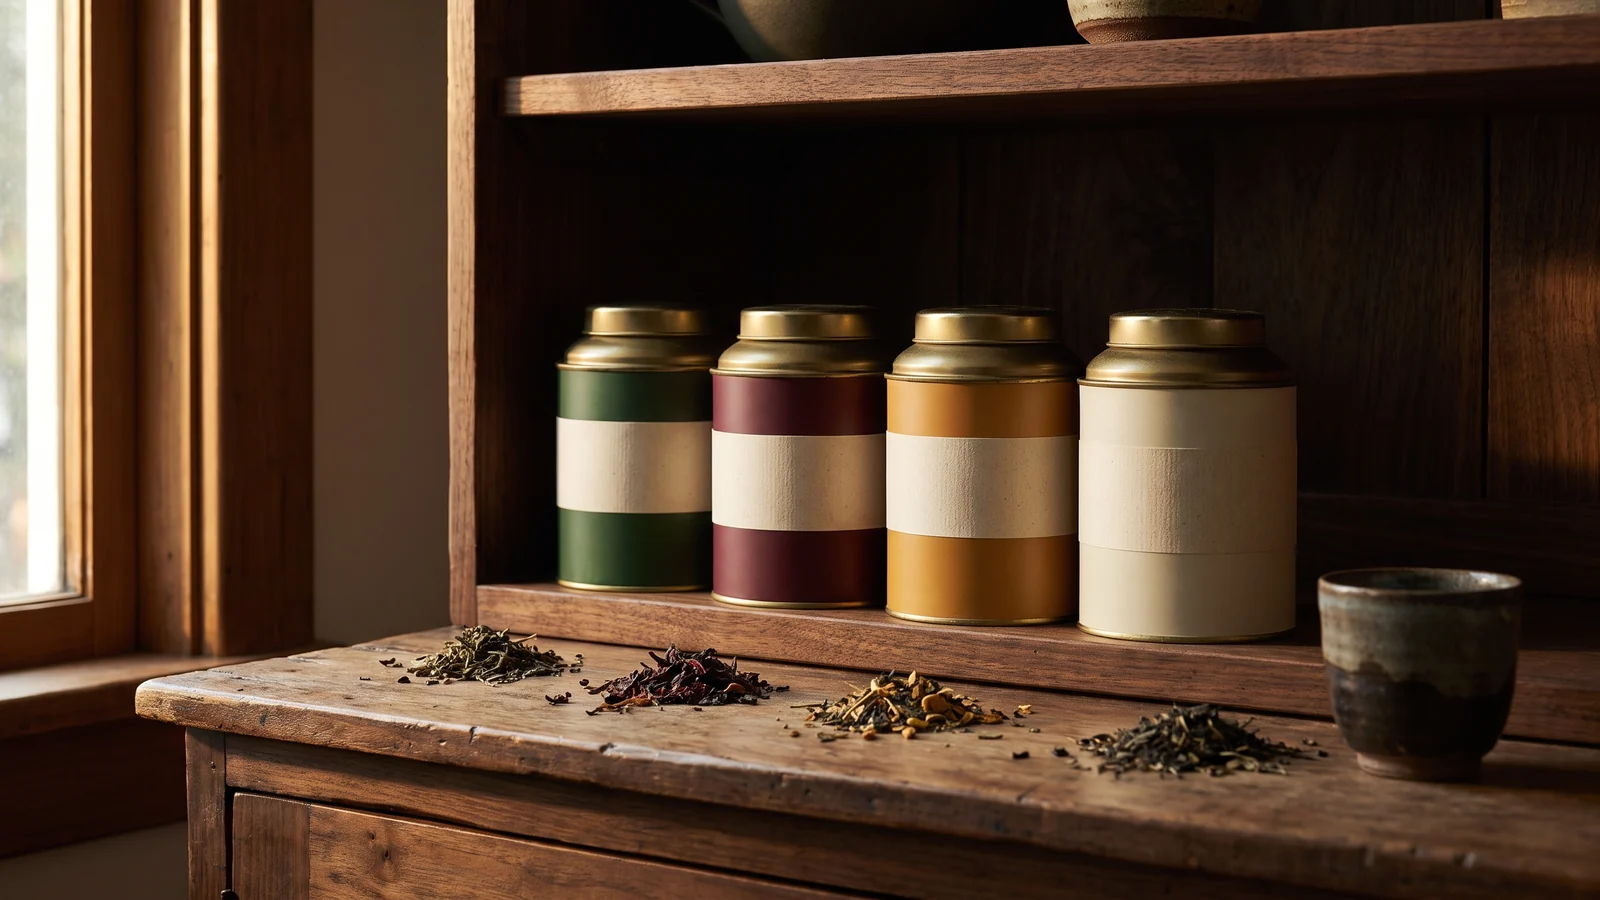
This guide shows how to make on-brand product photos for new SKUs without re-inventing the shoot each time. The idea is simple: write your brand's look down once as a reusable template — a style block, a shot list and fixed settings — and then every new product is just new reference photos running through the same template. All the samples below were made with BulkImagen for an invented tea brand launching two new tins.
If you want the basics of restaging a product from a reference photo first, read our guide to bulk product photos. This article is about the part that comes after: making the hundredth product look like it belongs with the first.
What makes a product photo "on-brand"#
"On-brand" sounds like taste, but in a product photo it comes down to a short list of decisions that a brand makes the same way every time:
| Decision | Example for our tea brand |
|---|---|
| Palette | deep forest green, warm cream, brass accents |
| Surfaces | dark walnut wood, unglazed stoneware, linen |
| Light | low warm side light, soft deep shadows, late afternoon |
| Composition | product slightly off-centre, lots of negative space, eye level |
| Props | loose tea leaves, a stoneware cup, nothing branded, never more than two |
| Never | bright white studio, neon colours, people's faces, text in the scene |
If you can't fill in that table for your brand, do that first — on paper, with your three favourite existing photos in front of you. Every row you leave blank is a decision the AI will make differently for each product, and that is exactly how a catalog drifts.
Step 1: Turn the table into a style block#
Compress the table into one paragraph you will paste into every prompt. This is your style block. It describes the look, not the scene:
brand photography style: deep forest green, warm cream and brass palette; dark walnut wood, unglazed stoneware and natural linen surfaces; low warm side light from the left like late afternoon, soft deep shadows; eye level, product slightly off-centre with generous negative space; at most two props from loose tea leaves, a plain stoneware cup or a linen cloth; no white studio backdrop, no bright or neon colours, no people, no text or logos in the sceneWrite the "never" rules into it explicitly. Models drift towards the most common product photo on the internet — a bright white studio — unless told not to.
Step 2: Write the shot list once#
Next, decide which images every product gets. Each shot is one prompt line: the scene first, then the style block, then your product protection sentence. Three shots cover most product pages:
hero: the product standing on a dark walnut table, a few loose tea leaves beside it [style block] [protection sentence]
in use: the product with its lid off beside a stoneware cup of steaming tea, on folded linen [style block] [protection sentence]
detail: close-up of the product's label and lid, shallow depth of field, walnut table edge [style block] [protection sentence]
The protection sentence is what keeps each new SKU looking like itself while everything around it follows the brand:
keep the product from the reference image exactly as it is: same tin shape and proportions, same lid, same colours, same label artwork; do not redesign it, do not add logos or any text to the product or the labelTip
Keep the shot list in a spreadsheet, one shot per row, with the full prompt in a prompt column. BulkImagen's Spreadsheet input reads that column directly (there is a Download template link if you want the exact format). The sheet becomes your brand's shot list: versioned, shareable with a freelancer, and identical every time you load it.
Step 3: Fix the settings and write them down#
A style block can't fix a look that the settings keep changing. Choose these once and record them next to the shot list:
- Model. One model for the whole brand. Different models render the same words differently, which shows up as two "photographers" in one shop.
- Aspect ratio. Usually one per channel: 1:1 for marketplaces, 4:5 for social feeds. Each format is its own batch.
- Resolution. Pick the size your store actually serves; there is no brand benefit in rendering the detail shot larger than the hero.
- Images per combo. 1. On-brand comes from the template, not from picking the best of four.
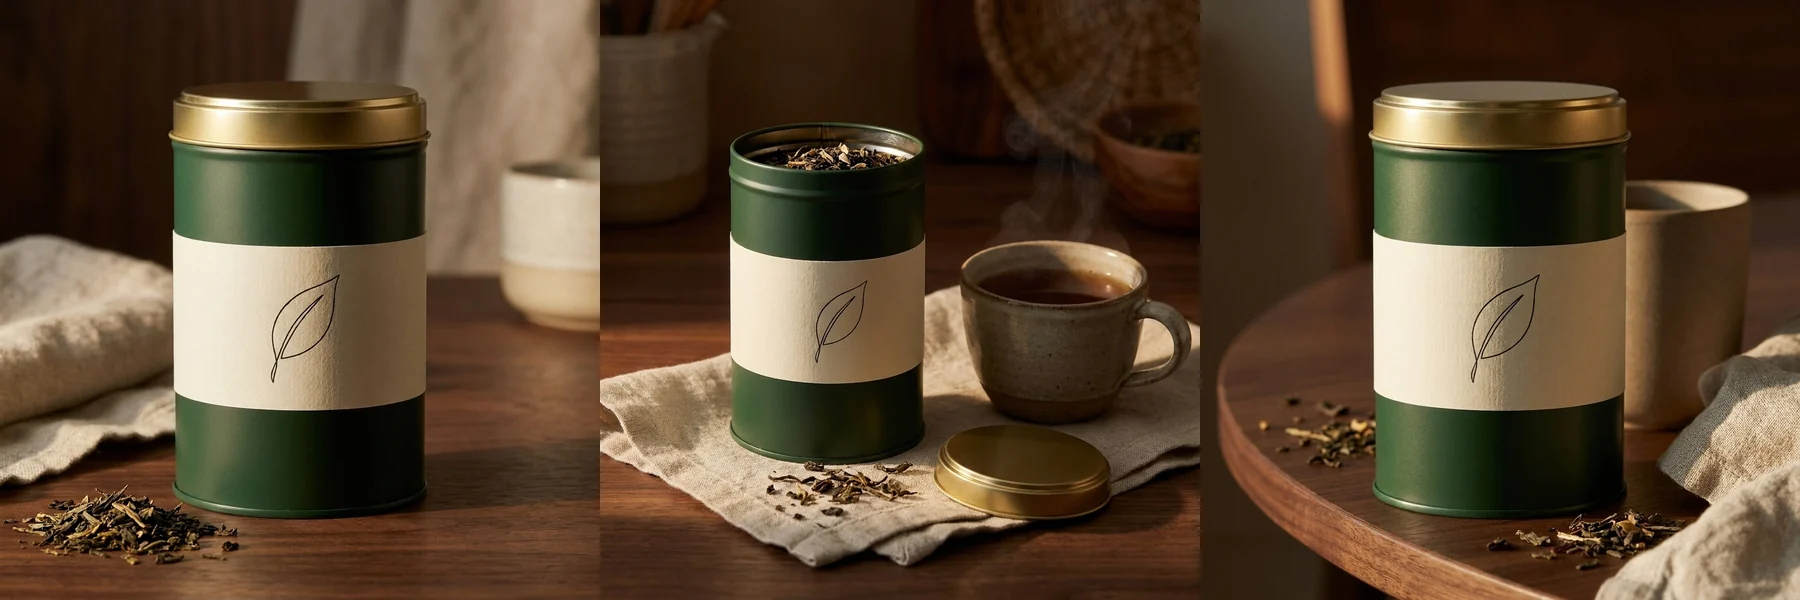
Step 4: Run the first SKU and approve the look#
Run the template on one product before anything else. Upload its reference photo, choose Per image, load the shot list, check the estimate and start. Then judge the result the way a customer will:
- Do the three images look like one shoot?
- Would you recognise them as yours with the logo hidden?
- Does anything break a "never" rule — a white backdrop creeping in, a prop you didn't list?
Ours shows one example of a template bug. The detail line asked for a close-up of the label and lid, and it came back as a medium shot on a different table — consistent across products, but not what the line asked for. The fix belongs in the shot line ("the tin fills most of the frame, only part of the table visible"), not in a reroll of one image.
Fix the template, not the image. If the light comes out cold, the style block needs "warm"; if a white backdrop appears, the "never" list needs it. Re-run until the first SKU is right. That approved batch is now your brand template.
Step 5: Every new SKU is a Remix#
When the next product arrives, you don't rebuild anything. Open the approved batch and press Remix: it copies the model, aspect ratio, resolution, background setting, every prompt line and the reference mode into a new batch. Remove the old reference photo, upload the new SKU's photos, check the estimate and start. Nothing is charged until you submit.
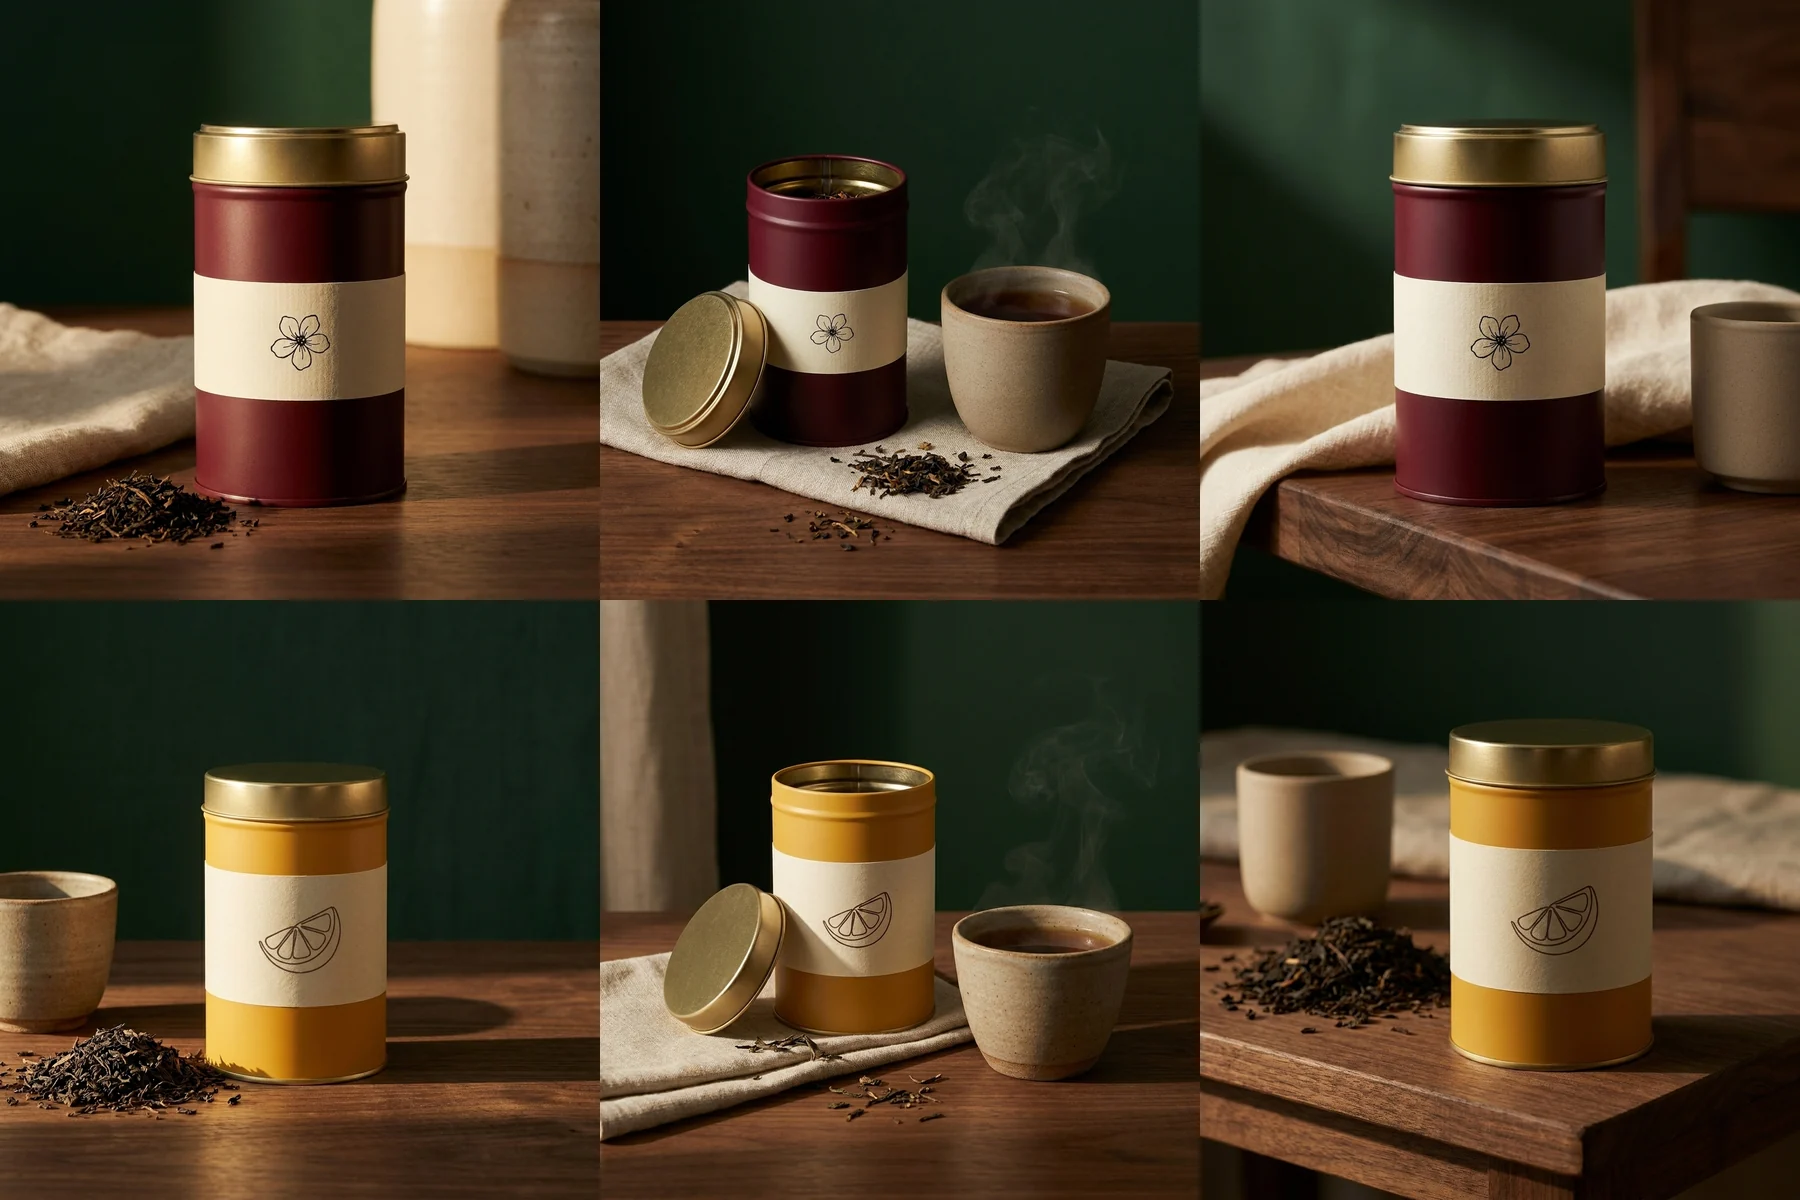
Because Per image pairs every reference with every prompt, you can launch several SKUs at once: five new products × three shots = fifteen images, all from the same template, in one batch. Below are two new tins through the same three lines. Nothing in the prompts changed between them — the dark green wall, the walnut, the linen and the stoneware cup come from the style block, and each tin keeps its own colour and label drawing because of the protection sentence.
Step 6: Use an approved image as a style reference#
Words carry most of a look, but not all of it — the exact green of a shadow, the grain of the walnut. When a new SKU still doesn't match, show the model your approved image as well as describing it.
Use Combine images with two references: the new product photo first, one approved hero image from your template run second.
photograph the product from the first reference image in the same style as the second reference image: same surfaces, palette, light direction and mood; do not copy the product in the second image; keep the product from the first reference exactly as it is, same shape, colours and label artwork; no text or logos in the sceneCombine sends every uploaded reference into every image, so this runs as one batch per new product rather than all SKUs together. Use it for the hero image of a launch, and keep the faster Per image template for everything else.
Step 7: Review against the brand, not just the product#
Two different reviews catch two different failures:
- Product accuracy, image by image. Label artwork, colour, lid, proportions — the same checks as any product photo. Anything wrong here is a returns risk, so fix it before publishing.
- Brand consistency, as a grid. Put the new images next to your approved set. Drift that is invisible on its own — a slightly cooler light, a lighter wood — is obvious side by side.
When a SKU passes both, Download ZIP. The archive's CSV manifest maps every file to its prompt and reference photo, so the shots go to the right product pages without opening each file.
Automating the template#
If you launch products every week, the template can run without the form. The BulkImagen API accepts the same inputs — reference image URLs, the prompt lines, model, aspect ratio, resolution and background — so a script can watch for new products in your store, submit the shot list against their photos and collect the results. The template stays the single source of truth; the script just stops you clicking. API access is part of the paid plans on the pricing page.
A template checklist#
- A filled-in brand table: palette, surfaces, light, composition, props, never.
- One style block, pasted, never retyped.
- A shot list in a spreadsheet, each line = scene + style block + protection sentence.
- Fixed model, ratio, resolution, images per combo = 1, written down.
- One approved first SKU before anything else runs.
- Every new SKU through Remix of the approved batch.
- An approved hero image as a style reference for launches that must match exactly.
- Two reviews: product accuracy, then brand consistency as a grid.
The template is the asset, not the images: every hour you spend on it is repaid by every product after it. Open the bulk image generator and run your shot list on the next SKU you launch.