How to Generate Images from a List of Prompts, One Line Each
Generate images from a list of prompts in one batch: one prompt per line, check the image count and credits first, then download every image as one ZIP.
On this page
- Why one line per prompt
- Step 1: Paste your list into the prompt box
- When a paste splits one prompt into several
- Long prompts: use the expanded editor
- Step 2: Write the lines so they come back as a set
- Step 3: Check the count and the credits before you start
- Step 4: Start the batch and watch the list fill in
- When your list lives in a spreadsheet
- Add the same reference image to every line
- Download the whole list as one ZIP
- Common mistakes with prompt lists
- A checklist for your first list
Most image tools are built for one picture at a time: type a prompt, wait, save, type the next one. That is fine for one image and painful for thirty. If you already have the list — product scenes, ad variations, flashcard words, storyboard beats — the fastest way to generate images from a list of prompts is to hand over the whole list at once and get the whole set back.
In BulkImagen that is literally how the form works: one line is one prompt, and one prompt is one image. Paste 16 lines, get 16 images. This guide walks through the screens, the few rules that decide what counts as a line, and the habits that make a list of prompts come back as a set that belongs together.
Why one line per prompt#
A list is the natural shape of bulk work. Whatever you are making, you probably already wrote it down as rows somewhere — a spreadsheet of SKUs, a shot list, a word list, a script. Turning each row into an image should not mean thirty separate conversations.
One line per prompt keeps three things simple:
- You can see the whole batch before you pay for it. The list on screen is the batch.
- Every image traces back to its line. Results are numbered in list order, and the download names each file after its prompt.
- Editing is editing text. Fix one line, add five more, delete a duplicate — no settings to rebuild.
Step 1: Paste your list into the prompt box#
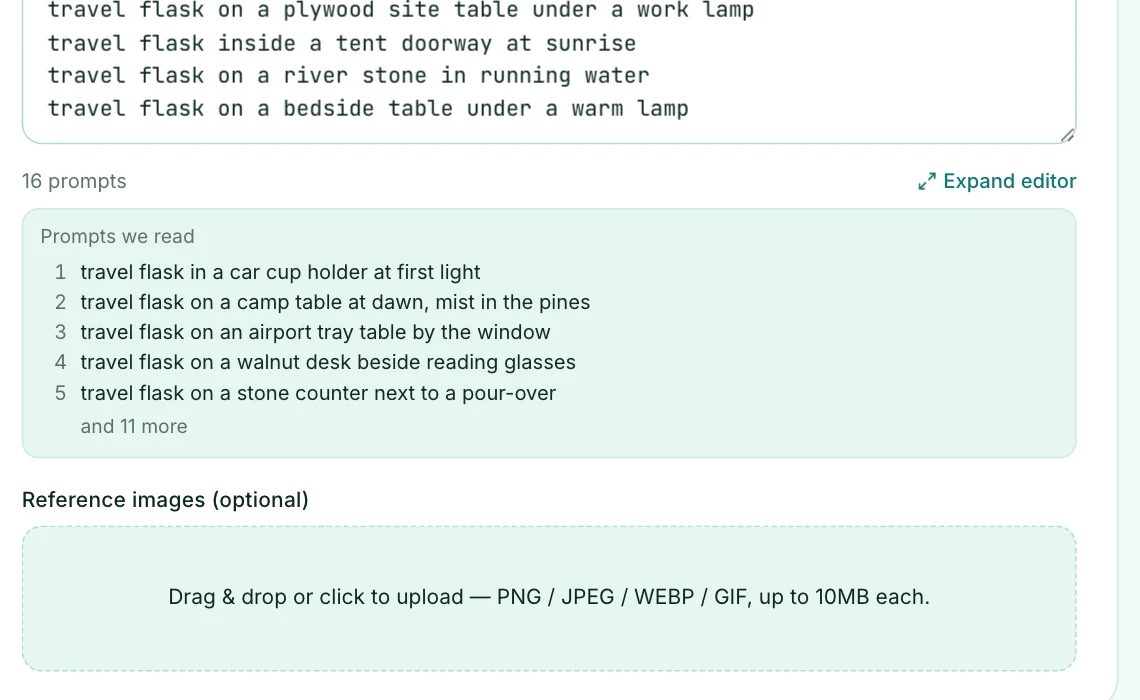
Sign in, open the dashboard and start a New batch. The input is set to Prompt × N by default, and the hint under the label says the rule: One per line — each line is a separate prompt.
Type or paste your list. A few details decide what counts as a prompt:
- Every non-empty line is one prompt. Blank lines are ignored, so spacing out your list for readability costs nothing.
- Leading and trailing spaces are trimmed. Indentation is fine.
- Everything on the line is sent. If your list is numbered ("1. a red apple"), the "1." goes to the model too. Strip list numbers and bullets before pasting.
Under the box you will see a live count — 16 prompts — and, once there are two or more lines, a Prompts we read panel showing the first five exactly as they will be sent, plus how many more follow. Glance at it before anything else: it is the quickest way to spot a list that got mangled on the way in.
When a paste splits one prompt into several#
Text copied from a document or a chat is often hard-wrapped: one long prompt arrives as three lines, and three lines means three prompts — three images and three times the credits. BulkImagen does not guess which you meant. When you paste several lines at once it says what it did — Pasted as 3 separate prompts — with a one-click Make it 1 prompt button next to it. Click it and the line breaks from that paste are removed; click Split into 3 prompts to go back.
Long prompts: use the expanded editor#
Very long prompts are hard to edit as single lines. Expand editor opens the list as separate blocks, one block per prompt, where a prompt can wrap over as many lines as it needs. Two rules there:
- Line breaks inside a block are removed when you save — a block always becomes one line.
- Pasting text with blank lines between paragraphs splits it into one block per paragraph.
That makes it the easiest way to bring in a list drafted elsewhere with a blank line between prompts.
Step 2: Write the lines so they come back as a set#
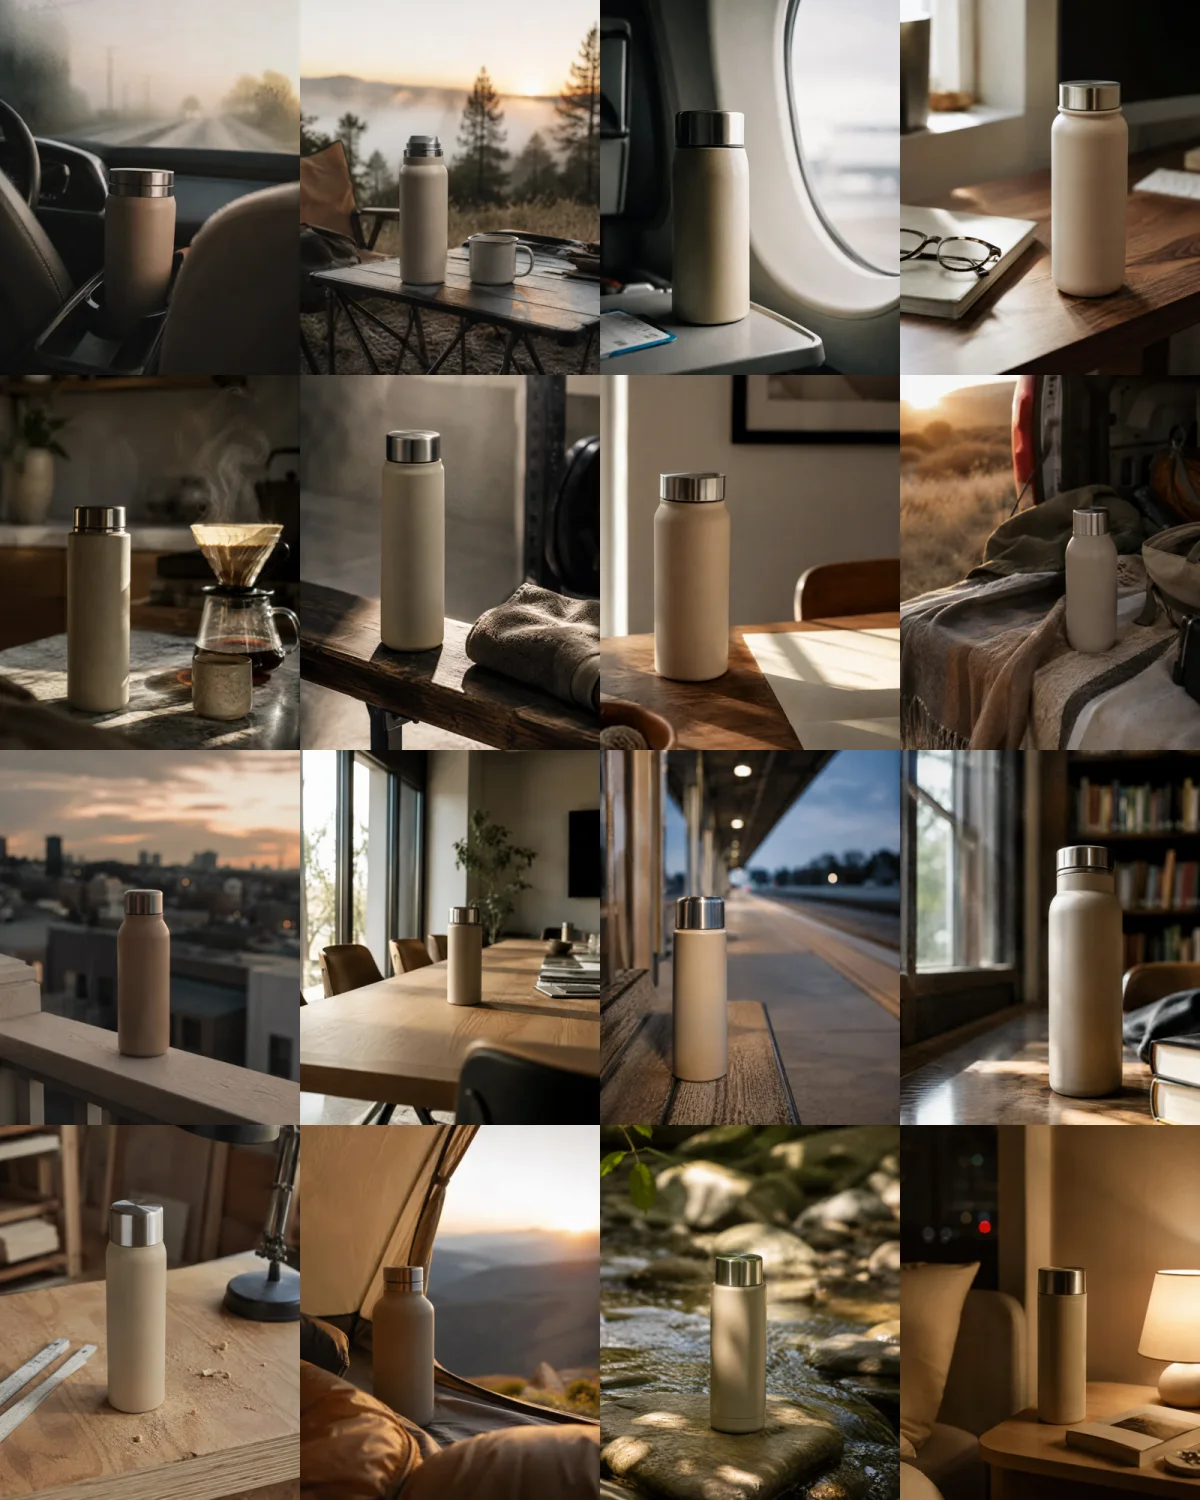
A batch is only useful if the images look like they belong together. Every line is sent on its own, so the model never sees the other lines — consistency has to be written into each one. The pattern that works is one style, many subjects: decide the shared part once, then change only the subject from line to line.
photorealistic lifestyle photograph, a matte sand-beige insulated travel flask with a brushed steel lid, unbranded, resting in a car cup holder at first light, empty road blurred beyond, natural light, 35mm lens, shallow depth of field, muted warm palette, no text, no logos
photorealistic lifestyle photograph, a matte sand-beige insulated travel flask with a brushed steel lid, unbranded, on a folding camp table at dawn, mist over pine trees behind, natural light, 35mm lens, shallow depth of field, muted warm palette, no text, no logos
photorealistic lifestyle photograph, a matte sand-beige insulated travel flask with a brushed steel lid, unbranded, on an airport tray table by the window, cool overcast light, natural light, 35mm lens, shallow depth of field, muted warm palette, no text, no logos
photorealistic lifestyle photograph, a matte sand-beige insulated travel flask with a brushed steel lid, unbranded, on a stone kitchen counter next to a pour-over, low morning sun, natural light, 35mm lens, shallow depth of field, muted warm palette, no text, no logos
Three habits make the difference:
- Repeat the shared description word for word. "A matte sand-beige insulated travel flask with a brushed steel lid" in every line keeps the product recognisable across the set. Paraphrasing it ("a beige bottle", "the thermos") invites the model to redesign it.
- Describe the camera, not the quality. Lens, light and palette ("35mm, natural light, muted warm palette") give a consistent look; words like "beautiful, 4k, masterpiece" do not.
- Put any text you want in the image in quotes. Models copy a quoted string far more faithfully than a described one:
a poster with the words "LISBON" across the bottom.
Tip
Build the lines in a spreadsheet. Put the shared style in one cell and the subjects in a column, join them with a formula such as =$B$1 & ", " & A2, fill it down, and paste the column into the prompt box. Changing the style for all thirty lines is then a one-cell edit.
Step 3: Check the count and the credits before you start#
Below the prompts, set the batch-wide options: model, aspect ratio, resolution and Images per combo. These apply to every line.
Images per combo is the multiplier to watch, and it starts at 4. At 1, sixteen lines make sixteen images. At 4, the same sixteen lines make sixty-four — four takes of every prompt. If you only want one image per line, set it to 1.
The bar at the bottom shows the result before anything happens: Will generate 16 images · 80 credits. It updates as you type, change the model or change the count, and the formula is simple — lines × images per combo × the model's price per image at that resolution. Credits are charged when you press Start batch, not before.
The form also catches two problems here instead of after you have paid:
- A line that is too long for the chosen model. Each model has its own prompt-length cap, and the form tells you which line number is over it.
- A batch over your plan's per-batch limit. Split the list into two batches, or see pricing for higher limits.
Note
Switching models is one click and the estimate follows immediately, so it is easy to compare. Our models page lists every model side by side, including which ones accept reference images.
Step 4: Start the batch and watch the list fill in#
Press Start batch. Every line becomes its own task and the tasks run in parallel, so images arrive as they finish rather than strictly in order. The batch page shows one tile per image, numbered in list order — tile #001 is your first line — with a running count at the top.
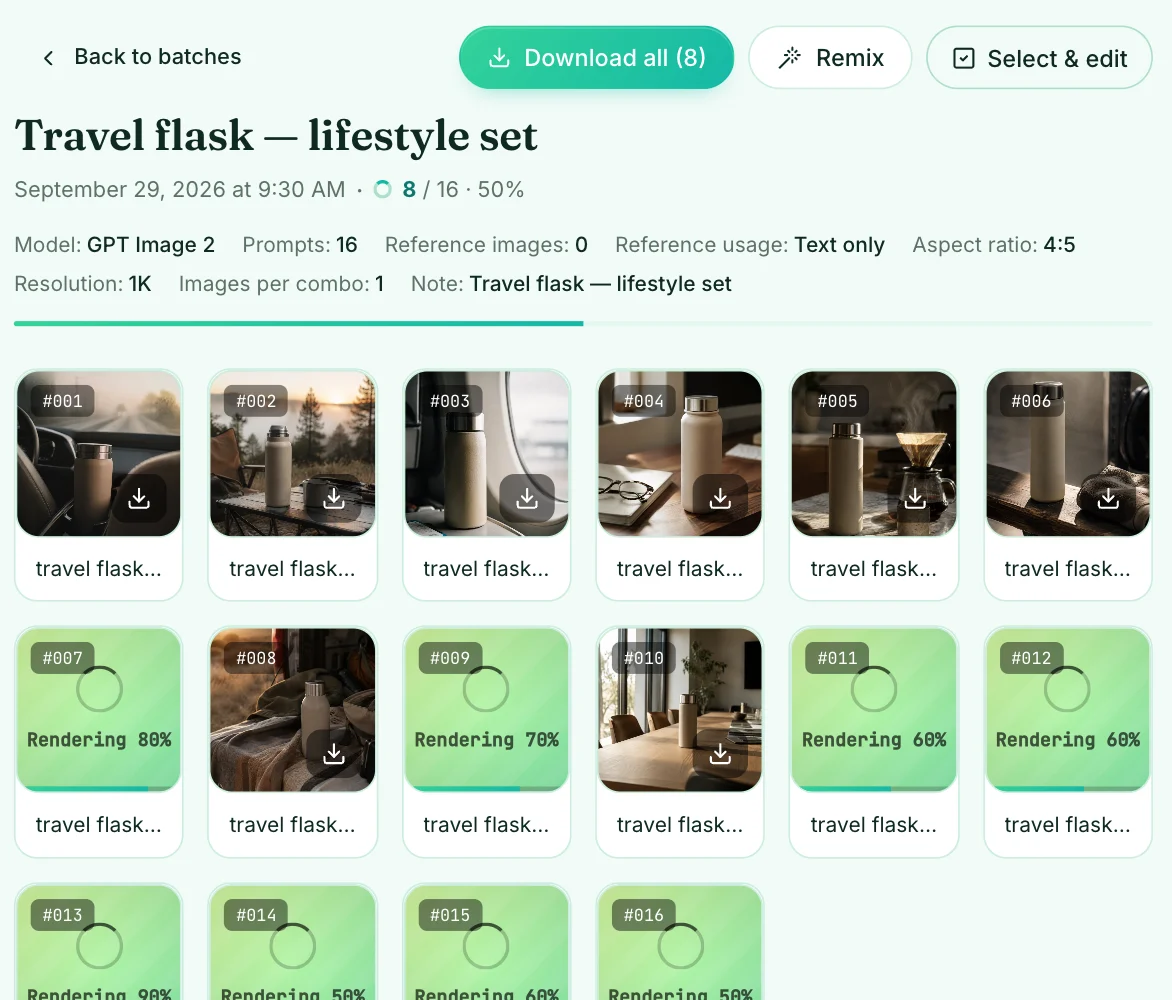
If a line fails, it is refunded automatically, and Retry re-runs the ones worth retrying. Remix copies the whole batch — every line and every setting — back into the form, which is the fastest way to fix two lines and run again.
When your list lives in a spreadsheet#
If the list is already a sheet, switch the input to Spreadsheet and upload a .csv, .xls or .xlsx file; once it is loaded you can edit the rows right in the form. BulkImagen reads the column named prompt — or the first column whose header contains "prompt", such as image_prompt — and ignores the rest, so you can keep IDs and notes in other columns. With no prompt header it reads the first column and warns you. Empty rows are skipped and counted. Download template gives you the exact format.
The same batch-wide settings apply: every row uses the model, aspect ratio, resolution and images per combo you choose below.
Add the same reference image to every line#
Lines can also share a picture. Upload a reference image and choose Per image: each reference is paired with every line and generated separately, so one product photo plus six scene lines gives six images of that same product in six scenes. It is the core of making bulk product photos with AI, and it works the same way with a character sheet, a logo or a style sample.
Watch the multiplier again: in Per image mode the total is lines × references × images per combo.
Download the whole list as one ZIP#
When the batch is done, Download all packs every image into one ZIP. Each file name carries its number and the start of its prompt, so they sort in list order. The archive also contains prompts.csv with one row per file: the file name, the full prompt, the model, aspect ratio, resolution, the reference image if there was one, and the batch ID. That file is what lets you map fifty images back to fifty rows of your original list without opening a single one.
Common mistakes with prompt lists#
| Mistake | What happens | Fix |
|---|---|---|
| A long prompt pasted with line breaks | It becomes several prompts and several images | Click Make it 1 prompt on the paste notice, or use the expanded editor |
| Numbered or bulleted list | "1." and "•" are sent to the model as part of the prompt | Strip numbers and bullets before pasting |
| Shared description reworded per line | The product or character drifts from image to image | Copy the shared part word for word into every line |
| Images per combo left above 1 | Every line renders several times, multiplying the cost | Set it to 1 unless you want several takes per line |
| One giant list | Over the per-batch limit | Split into batches of related lines |
A checklist for your first list#
- One prompt per line, no numbering, blank lines allowed.
- The shared style and subject description repeated word for word.
- Prompts we read checked for split or merged lines.
- Images per combo at 1 unless you want variations.
- The estimate read before pressing Start batch.
- One ZIP with
prompts.csvto trace every file back to its line.
For more ways to run large jobs, see how to generate images in bulk. When your list is ready, paste it into the bulk image generator and run the first ten lines as a test.