How to Make Consistent Character AI Images for a Whole Storyboard
Make consistent character AI images across every scene: one reference image, one lock sentence, a numbered scene list, and two-character shots that hold up.
On this page
- Why AI characters change from scene to scene
- Step 1: Make one clean character reference
- Step 2: Write a lock sentence and a numbered scene list
- Step 3: Set up the batch
- Two characters in one frame
- When a frame drifts anyway
- A consistency checklist
- FAQ
- Can I lock a seed to keep the character the same?
- Will the character be identical in every image?
- Do I need to repeat the character description in every scene?
- How many scenes can I run at once?
- Can I use this for comics or children's books?
- The whole workflow on one card
The short answer: to make consistent character AI images, don't describe your character again for every scene — show it. Make one clean reference image of the character, attach it to every scene, add one sentence that names what must not change, and run all the scenes as one batch. In BulkImagen that is a single batch in Per image mode: one reference × one line per scene = one image per scene, downloaded together.
This guide walks through that workflow for storyboards, comics, picture books and faceless video b-roll, with a side-by-side test of what happens with and without a reference. Every image in it comes from our own test batches, starring an invented character: Mara, a red-haired mountain postwoman in a yellow raincoat.
Why AI characters change from scene to scene#
Every image in a batch is rendered on its own. The model has no memory of the image before it, so whatever your prompt leaves open, it decides again — the shape of the face, the age, the proportions, the drawing style.
A detailed description narrows that down, but it can't close it. We ran three scenes with a long, careful text description of Mara and no reference image, then the same three scenes with her reference image attached:
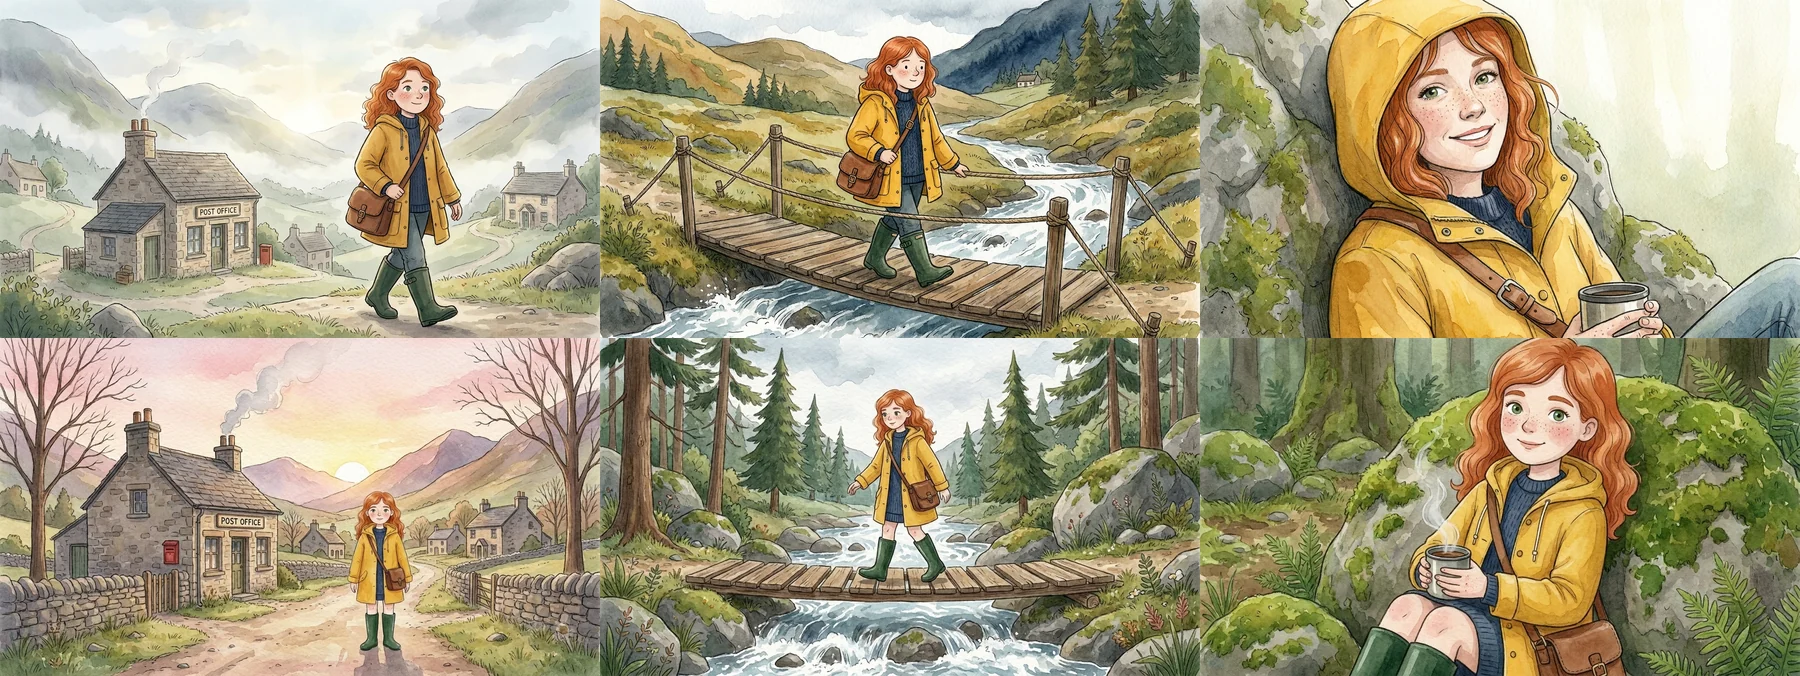
The top row is the honest result of text alone. The costume carried over — yellow raincoat, satchel, green boots in every frame, because we described them precisely. The person didn't. She reads as an adult in the first frame, a child on the bridge and a different illustrator's heroine in the close-up, with a different face and heavier freckles. The bottom row, made with the reference, keeps her face, age, proportions and style.
| Text description only | With a reference image | |
|---|---|---|
| Clothes and colours | Mostly held, if described precisely | Held |
| Face and age | Drifted between scenes | Held |
| Body proportions | Drifted | Held |
| Drawing style | Drifted | Held |
That is the whole case for this workflow: words are good at things, pictures are good at people.
Step 1: Make one clean character reference#
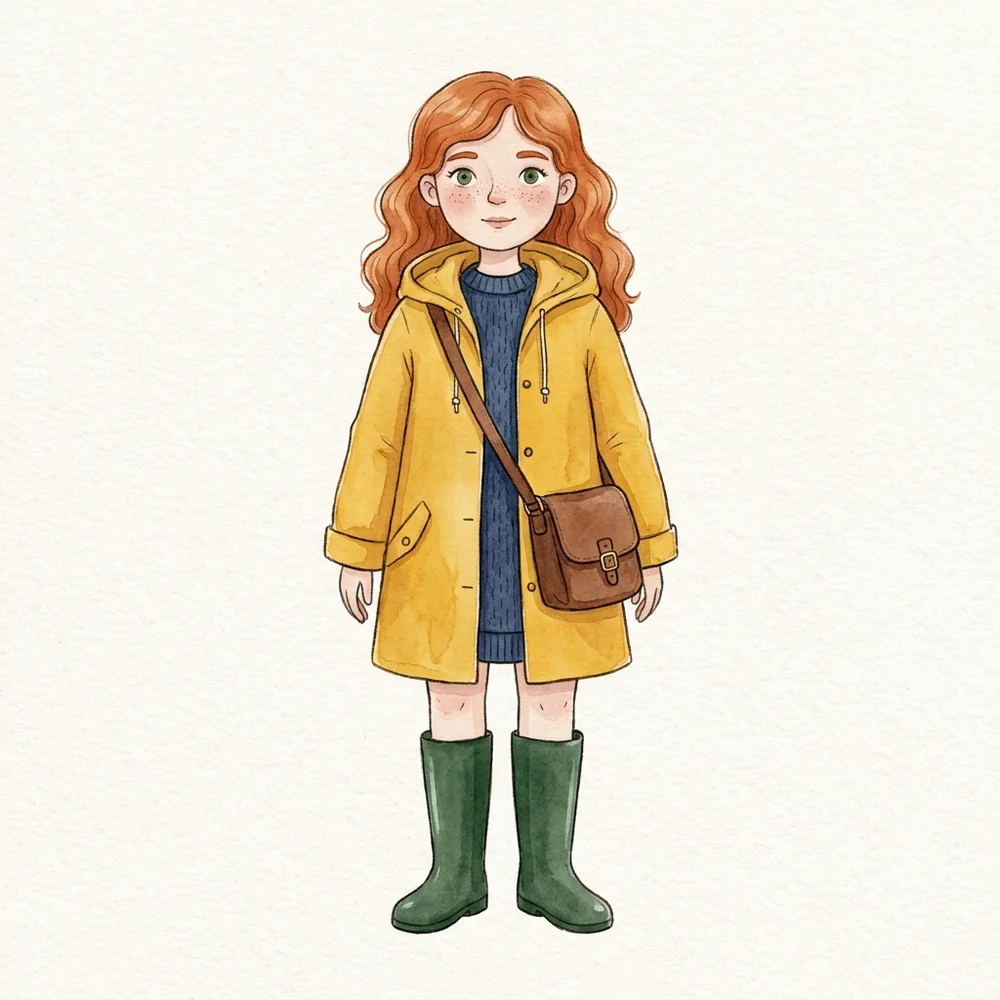
Your reference image is the character's source of truth, so make it easy to read:
- One figure, full body, front view. The model can't keep what it can't see — if the boots are cropped, the boots will change.
- Plain background, even light. Nothing in the reference should compete with the character.
- The final style. If the storyboard is watercolour, the reference is watercolour. A photo reference pulls scenes toward photos.
- Distinct, nameable features. A yellow raincoat and copper-red hair are easier to keep than "casual clothes".
You can draw or photograph a reference, or generate one. Ours came from a single text-only line: the character description followed by "character reference sheet image: one single full-body figure, front view, standing straight… plain off-white paper background, even light, no text". Generate a few, pick the one you like, and use that same file for everything after.
Warning
Only use photos of real people when you have the right to, and their permission. A fictional character you generated or drew yourself is the safe default for public work.
Step 2: Write a lock sentence and a numbered scene list#
Each scene line has two parts: what happens in the scene, and a lock sentence that tells the model what must stay exactly as it is in the reference. Write the lock once and add it to every line:
the woman from the reference image, kept exactly as she is: same face, freckles, green eyes and age, same shoulder-length wavy copper-red hair, same mustard-yellow hooded raincoat, navy knit sweater, brown leather satchel with brass buckle and dark green rubber boots, same body proportions; same watercolour picture-book style as the referenceName the features a reader would notice first — here the hair, the raincoat and the freckles — plus age and proportions, which are the first things to drift.
Then write one line per scene, each starting with its number:
Scene 01 – setting off at dawn from a small stone post office in a mountain village, wide shot; [lock sentence]; no text, no lettering, no signs, no logos
Scene 02 – climbing a steep zigzag path through a pine forest in light rain, hood up, medium shot from the side; [lock sentence]; no text, no lettering, no signs, no logos
Scene 03 – crossing a narrow wooden footbridge over a rushing mountain stream, wide shot; [lock sentence]; no text, no lettering, no signs, no logos
Scene 04 – handing a letter through the half-open door of a farmhouse to an unseen person, only a hand visible at the door, medium shot; [lock sentence]; no text, no lettering, no signs, no logos
Scene 05 – resting on a mossy rock with a thermos cup, close-up of her face, smiling; [lock sentence]; no text, no lettering, no signs, no logos
Scene 06 – walking home at dusk along a ridge, lit windows of the village in the valley below, wide shot; [lock sentence]; no text, no lettering, no signs, no logos
Why the numbers? When you download the batch, each file name starts with the beginning of its prompt, and the archive includes a prompts.csv listing every file name next to its full prompt. Starting each line with Scene 01, Scene 02 puts the scene number in the file name itself — so the frames line up with your script without opening a single file.
Tip
Give camera directions in every line: wide shot, medium shot, close-up. Storyboards need varied framing, and a scene line without one tends to come back at the same distance as the last.
Step 3: Set up the batch#
- Open the dashboard and start a New batch.
- Upload the reference image under Reference images and choose Per image. With one reference, every scene line is paired with it: 6 lines = 6 images.
- Paste the scene list into the prompt box — one line per scene — or, if your shot list lives in a spreadsheet, switch to Spreadsheet and upload it with the scenes in a
promptcolumn. - Pick a model that accepts reference images (the form tells you if the one you picked doesn't) and keep the same model for the whole story. Our models page compares them side by side.
- Choose the frame: 16:9 for video storyboards and YouTube, 9:16 for Shorts and Reels, 4:3 or 3:4 for picture-book spreads and comic pages. Not every model offers every ratio at every resolution; the form greys out the ones that aren't available.
- Check the estimate — Will generate 6 images · N credits — and press Start batch.
Here is what that batch produced:
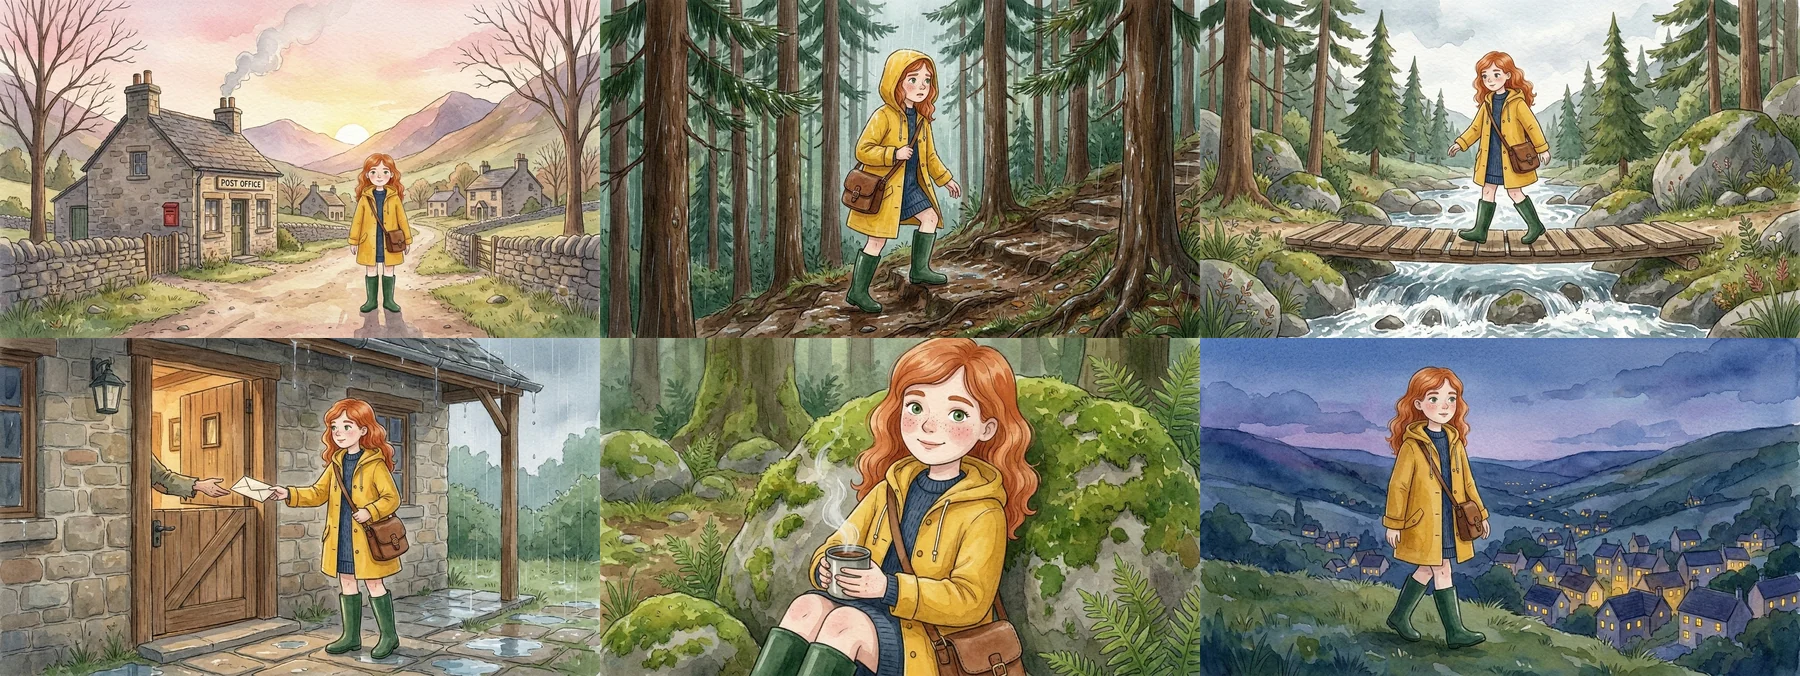
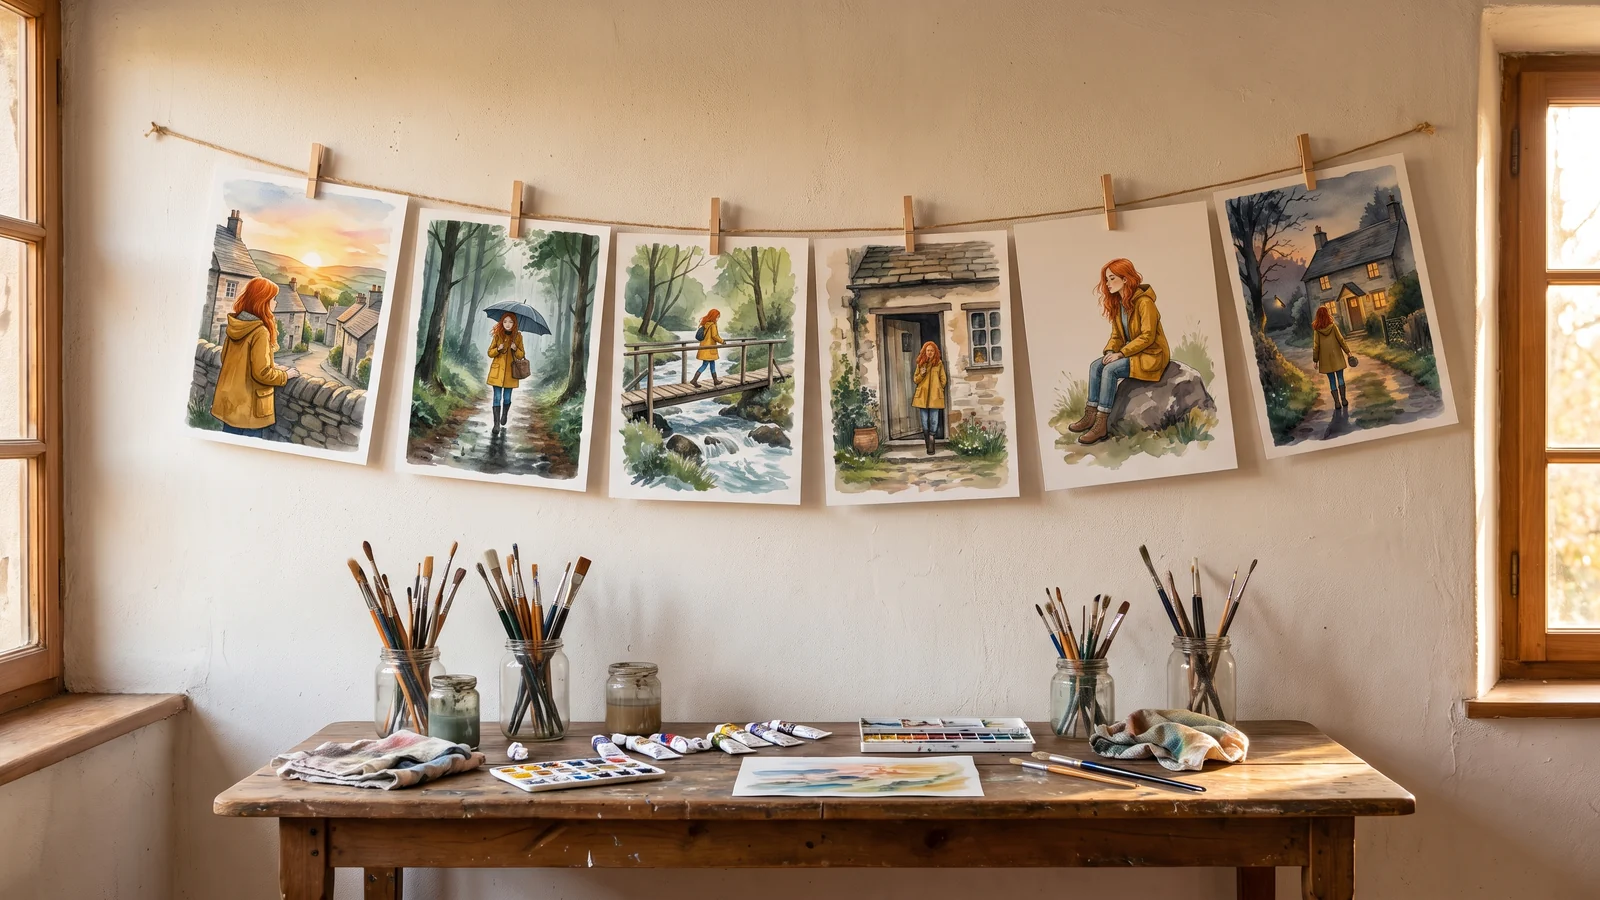
Same face, same age, same proportions and same style in all six frames, from wide shots to a close-up, in rain and at dusk.
One thing went wrong, and it is instructive: Scene 01 has a "POST OFFICE" sign above the door, even though the line says "no signs". We asked for a post office, and the most recognisable post office has a sign. When a word names a building or a product, describe what it looks like instead — "a small stone cottage with a red postbox by the door" — and the model has nothing to label.
Two characters in one frame#
Stories need more than one character. For a shot with two, give the model both references at once with Combine images: every reference you upload goes into each image together.
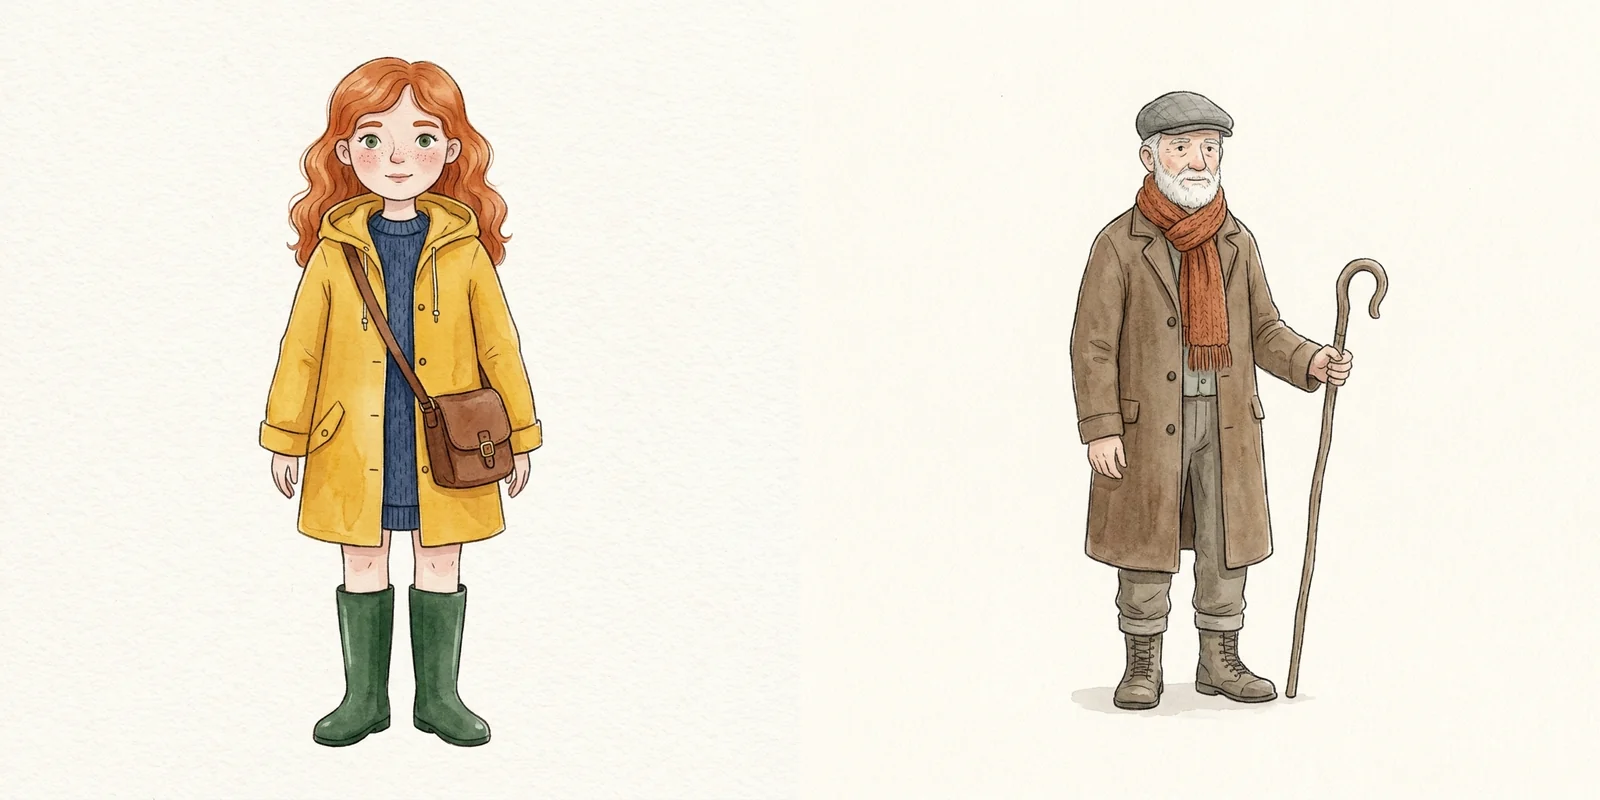
Refer to them by upload order in the lock sentence:
the woman from the first reference image and the old man from the second reference image, both kept exactly as they are: same faces, hair, beard, clothes, colours and proportions as in their reference images; same watercolour picture-book style as the references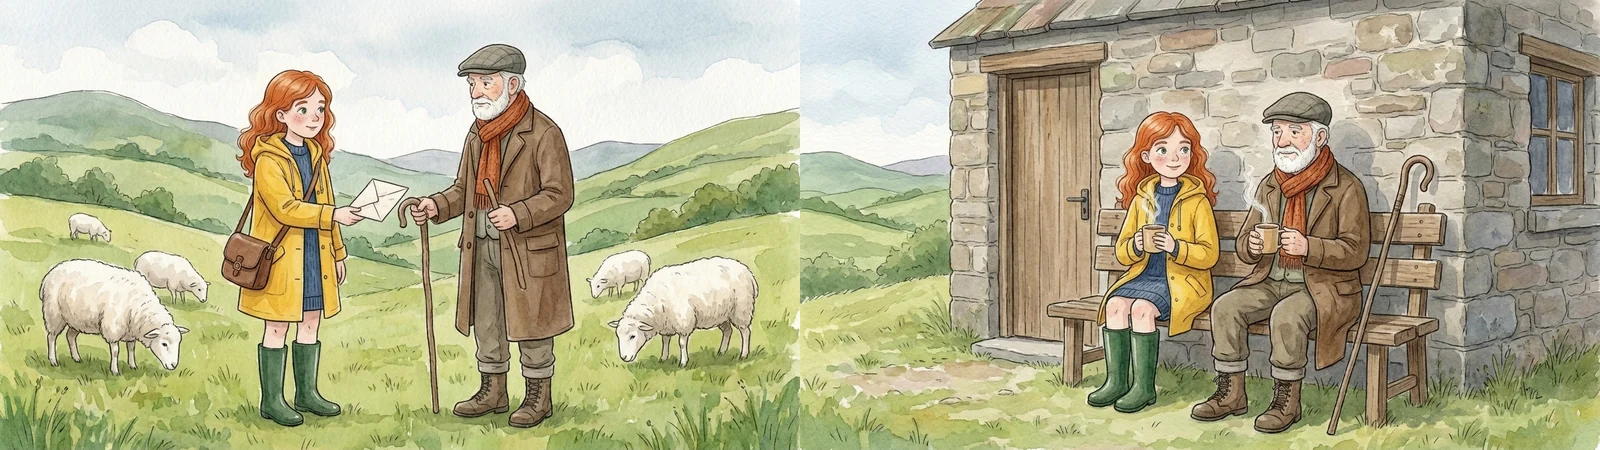
Two things to know about Combine:
- It attaches every reference to every image. So keep two-character scenes in their own batch, and solo scenes in a Per image batch with just that character's reference. Upload the references in the same order every time, so "first" and "second" never swap.
- Each model has a reference limit. Most accept up to four or eight references in Combine mode, but some accept only one — and a one-reference model can't do a two-character shot. The models page lists the limit for each.
When a frame drifts anyway#
Even with a reference, a frame will sometimes come back slightly off — a rounder face from a low angle, a satchel on the wrong shoulder. Three ways to handle it:
- Fix the line, not the luck. If the same feature drifts twice, it is missing from the lock sentence. Add it ("satchel worn on her left shoulder") and re-run that scene.
- Ask for two takes. Setting Images per combo to 2 renders every scene twice so you can pick the better one. It doubles the cost, so use it for the hero frames, not the whole board.
- Promote your best frame. On the batch page, select a frame where the character looks exactly right and choose Remix selected. It starts a new batch that uses that image as the reference — useful when you want a new angle or expression to become the version you keep using.
A consistency checklist#
Before you call a storyboard done, look at all frames side by side and check, in order:
- Face: eye colour, freckles, nose and face shape.
- Age and proportions: the easiest thing to drift and the most jarring.
- Hair: colour, length and parting.
- Costume and props: every item in the lock sentence, on the correct side.
- Style: line weight and colour palette match the reference.
- Unwanted text: signs, labels and lettering the scene didn't need.
Then press Download ZIP. Each file carries its scene number in the name, and prompts.csv maps every file to its full prompt and the reference it used.
FAQ#
Can I lock a seed to keep the character the same?#
No — BulkImagen doesn't expose a seed setting. The reference image is the consistency mechanism, and it carries far more information about a character than a seed does.
Will the character be identical in every image?#
Very close, not guaranteed. In our test the face, age, proportions and style held across all eight frames, but small details can drift, especially at unusual angles. Check every frame against the reference before you publish.
Do I need to repeat the character description in every scene?#
Repeat the lock sentence, not a full biography. It names what must stay the same; the reference image shows what that looks like. Our scene lines plus the lock were well within every model's prompt length limit, and if a line is ever too long, the batch is rejected before anything is charged.
How many scenes can I run at once?#
As many as your plan's per-batch limit allows, and you can run more batches for longer stories. The limits per plan are on the pricing page.
Can I use this for comics or children's books?#
Yes — the workflow is the same; only the aspect ratio and style change. Pick the page ratio, keep one reference per character, and number your panels the way you number scenes.
The whole workflow on one card#
- One clean, full-body reference per character, in the final style.
- One lock sentence naming face, age, hair, costume, proportions and style.
- One numbered line per scene, with a camera direction.
- Per image for solo scenes, Combine images for two-character shots.
- One model, one aspect ratio, for the whole story.
- Review side by side, fix drift in the lock sentence, download one ZIP.
The scene list is just a list, so a twelve-panel comic and a sixty-shot video storyboard take the same steps. When you're ready, open the bulk image generator and run your first six scenes.